Magento Docker Compose YML
Magento Docker Compose:
Execute the command in your CLI: docker compose up
version: '2'
services:
  mariadb:
    image: docker.io/bitnami/mariadb:10.4
    environment:
      # ALLOW_EMPTY_PASSWORD is recommended only for development.
      - ALLOW_EMPTY_PASSWORD=yes
      - MARIADB_USER=bn_magento
      - MARIADB_DATABASE=bitnami_magento
    volumes:
      - 'mariadb_data:/bitnami/mariadb'
  magento:
    image: docker.io/bitnami/magento:2
    ports:
      - '80:8080'
      - '443:8443'
    environment:
      - MAGENTO_HOST=localhost
      - MAGENTO_DATABASE_HOST=mariadb
      - MAGENTO_DATABASE_PORT_NUMBER=3306
      - MAGENTO_DATABASE_USER=bn_magento
      - MAGENTO_DATABASE_NAME=bitnami_magento
      - ELASTICSEARCH_HOST=elasticsearch
      - ELASTICSEARCH_PORT_NUMBER=9200
      # ALLOW_EMPTY_PASSWORD is recommended only for development.
      - ALLOW_EMPTY_PASSWORD=yes
    volumes:
      - 'magento_data:/bitnami/magento'
    depends_on:
      - mariadb
      - elasticsearch
  elasticsearch:
    image: docker.io/bitnami/elasticsearch:7
    volumes:
      - 'elasticsearch_data:/bitnami/elasticsearch/data'
volumes:
  mariadb_data:
    driver: local
  magento_data:
    driver: local
  elasticsearch_data:
driver: localBitnami Magento Docker Image with xDebug Support
In this document I assumed that you already installed Docker in Windows.
Pull Docker Images from Docker repositories
Step 1: You can use the docker-compose file found in this url and click the raw button then save to your local preferred location. Magento Docker Compose YML
Step 2: Open the CLI or PowerShell (which I am using) and go to the file (step 1) location then execute the command: docker compose up OR if you saved the file to a different name you can execute with: docker compose -f .\mylocalfile.yml up
Step 3: Wait to complete everything before you proceed.
How to install nano
Optional Utilities that I used is nano to edit the php.ini and I intend to include in this document as part of my personal preference:
Step 1: In your Docker Desktop under Terminal do the following steps.
Step 2: $apt-get update
Step 3: $apt-get install nano
Update PHP configuration file
In the docker component you must enable and update the php.ini xDebug section in this folder opt/bitnami/php/etc/php.ini
Step 1: Go In the very last of the file where you can find the [XDebug] configuration settings.
Step 2: Replace the entries to the following:
;[XDebug]
zend_extension = xdebug
xdebug.mode = debug
xdebug.client_host = 127.0.0.1
xdebug.client_port = 9003
xdebug.output_dir = /tmp
xdebug.remote_handler = dbgp
xdebug.idekey = VSCODE
xdebug.start_with_request = yes
Step 3: Restart the docker component.
Make Visual Studio Code to Support PHP Debugging with xDebug
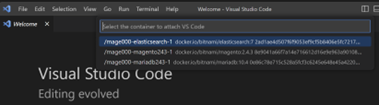
Step 1: Open your Visual Studio Code and in the bottom left corner click the Open Remote Window and select Attach to Running Container…
Step 2: Select the Magento container {/mage000-magento243-1 …}
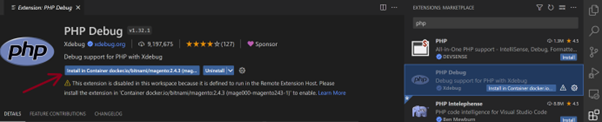
Step 3: Install the PHP xDebug Extensions (this will install in the container).
Step 4: Click the Run and Debug then icon then click the link create a launch.json file then select PHP from the option box.
Step 5: Replace everything with these new settings below:
{
    // Use IntelliSense to learn about possible attributes.
    // Hover to view descriptions of existing attributes.
    // For more information, visit: https://go.microsoft.com/fwlink/?linkid=830387
    "version": "0.2.0",
    "configurations": [
       {
            "name": "Listen for Xdebug",
            "type": "php",
            "request": "launch",
            "hostname": "127.0.0.1",
            "port": 9003,
            "stopOnEntry": false,
            "log": true,
            "pathMappings": {
                "/bitnami/magento": "${workspaceFolder}/bitnami/magento"
            }
       }
    ]
}
Change the sendmail settings in PHP configuration
Step 1: set the sendmail_path = /usr/local/bin/phpsendmail.php
Step 2: create a file phpsendmail.php under the folder /usr/local/bin
#!/usr/bin/php
<?php
        $logfile = '/bitnami/magento/var/mail_log/maillog.htm';
        if(file_exists($logfile) && filesize($logfile) >= 512000)
        {  // Delete 5K size
           unlink($logfile);
        }
        // Get the email content
        $log_output = "<br/>[" . date('Y-m-d H:i:s') . "] ";
        $handle = fopen('php://stdin', 'r');
        $count = 0;
        while(!feof($handle))
        {
                $count++;
                $buffer = trim(fgets($handle));
                if ($count <= 12) # Output header information
                        $log_output .= $buffer . ",";
                else # Output body
                        $log_output .= $buffer;
        }
        // Write the log
        file_put_contents($logfile, $log_output, FILE_APPEND);
?>
Note:
If you already have a file our local and wants to just copy to the container, just do the following command in the CLI (just change the source path and the {container_id}):
docker cp C:\phpsendmail.php {container_id}:/usr/local/bin
Access Container Volume under Windows Explorer
The container volume can be open in your Windows Explorer through WSL like:
\\wsl$\docker-desktop-data\version-pack-data\community\docker\volumes
Common Problem Encountered:
· Under the container magento folder, sometimes the folder is not accessible due to permission rights issue. I normally resolve the issue with chmod -R 777 magento_path and you can actually narrow down to a specific folder like magento/var OR magento/pub/.. . I am using 777 because I am only using this in my development environment, but it should not be the case in the production.
Docker + Magento
Reference: https://hub.docker.com/r/bitnami/magento/
version: '2'
services:
  mariadb:
    image: docker.io/bitnami/mariadb:10.4
    environment:
      # ALLOW_EMPTY_PASSWORD is recommended only for development.
      - ALLOW_EMPTY_PASSWORD=yes
      - MARIADB_USER=bn_magento
      - MARIADB_DATABASE=bitnami_magento
    volumes:
      - 'mariadb_data:/bitnami/mariadb'
      #- 'C:\Archer\DockerProject\Magento\Bitnami\persistence\mariadb:/bitnami/mariadb'
  magento:
    image: docker.io/bitnami/magento:2
    ports:
      - '80:8080'
      - '443:8443'
    environment:
      - MAGENTO_HOST=localhost
      - MAGENTO_DATABASE_HOST=mariadb
      - MAGENTO_DATABASE_PORT_NUMBER=3306
      - MAGENTO_DATABASE_USER=bn_magento
      - MAGENTO_DATABASE_NAME=bitnami_magento
      - ELASTICSEARCH_HOST=elasticsearch
      - ELASTICSEARCH_PORT_NUMBER=9200
      # ALLOW_EMPTY_PASSWORD is recommended only for development.
      - ALLOW_EMPTY_PASSWORD=yes
    volumes:
      - 'magento_data:/bitnami/magento'
      #- 'C:\Archer\DockerProject\Magento\Bitnami\persistence\magento:/bitnami/magento'
    depends_on:
      - mariadb
      - elasticsearch
  elasticsearch:
    image: docker.io/bitnami/elasticsearch:7
    volumes:
      - 'elasticsearch_data:/bitnami/elasticsearch/data'
volumes:
  mariadb_data:
    driver: local
  magento_data:
    driver: local
  elasticsearch_data:
    driver: local
This is only for development purpose.
Current issue that I experienced is when using the persistent data, the Magento somehow failed to continue the installation.
Guide
Run docker-compose through PowerShell
docker-compose up -d
Note: Magento will self install. Wait for couple minutes to proceed.
After Magento Installation
Step 1: Copy the extension and installer script by executing the command
docker container list
docker cp {extension-package}.zip {container_id}:/bitnami/
Step 2: Install zip in the container (execute the command inside the container)
apt-get update
apt-get install --assume-yes zip
Step 3: Create directory in "/bitnami/magento/app/code"
mkdir /bitnami/magento/app/code
Step 4: Unzip the {extension-package}.zip to ..app/code
unzip /bitnami/{extension-package}.zip -d /bitnami/magento/app/code
Install the Extension
magento module:enable {Extension_Package}
magento setup:upgrade
magento setup:static-content:deploy -f
magento setup:di:compile
magento cache:flush
Access the Magento Website
http://localhost/http://localhost/admin
Username: user
Password: bitnami1
If you want to execute your container command through PowerShell.
Step 1: Log into the container shell as root
docker exec -it {docker_name} /bin/bash
Step 2: Login as the web server user
su daemon -s /bin/bash
Congratulation!!!
Magento 2.4.x in Ubuntu 20.04 - Requirements & Installation guide
Guide for installing Magento 2.4.x in Ubuntu 20.04
Check the requirements using this link
https://www.mageplaza.com/kb/
For installing PHP please follow this link:
Magento 2 - cluster_block_exception [TOO_MANY_REQUEST/12/disk usage exceeded flood-sate watermark, index has read-only-allow-delete block]
Elasticsearch problem - Cluster Block Exception
I experienced this issue "cluster_block_exception" when I did a DI compilation and other during re-indexing.
/*di compile command*/
bin/magento setup:di:compile
/*re-indexing command*/
bin/magento indexer:reindex